Showing posts with label Scraproom Organization. Show all posts

Friday, May 13, 2011

Scrapbook Room Photos Updated!

Hey Stampers!
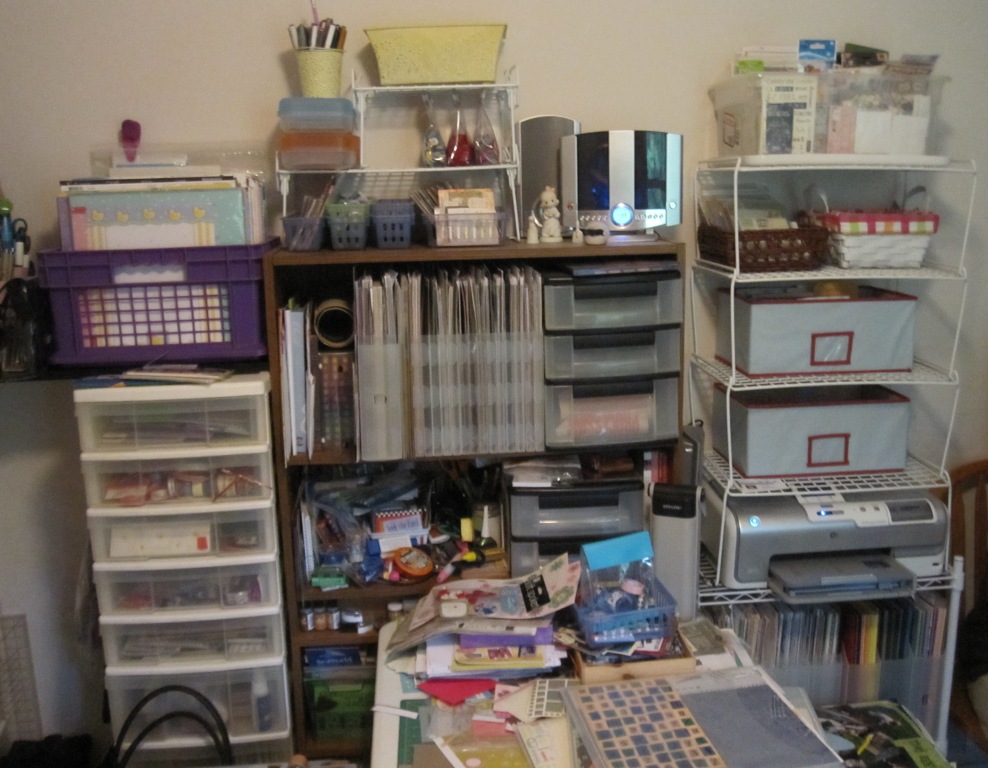
After much adue, I have finally gotten my room reorganized and my closet addition almost done!  I just couldn't wait to show you all the photos of my updated stampers paradise!  This first photo is of the room when you first enter my room.  As most of you know, that when I became a Stampin Up Demonstrator I got rid of most of my supplies that were not current Stampin Up products.  So you can see that some of my shelves now hold my cards and mini scrapbooks.
 

This photo is of the new closet!  It turned out that the Ikea items I bought for my closet didn't work out as I had hoped, so this is what we did instead.  I have made good use of the Ikea items in my upstairs classroom area.  At a later time, I will post photos of the upstairs classroom.  My plans for the closet is to keep all my Stampin Up paperwork and projects ready to go for workshops and classes.  When I have smaller classes in my scrap/stamping room it will provide extra surfaces to work off of.  As you can see my sweet husband installed shelves, lighting and electricity in my new closet.  We removed the doors to open up the space to be as part of the room.  On the right side, I have my epson printer and on the right I have my Photo Studio, which my husband got me for Christmas.


As you can see I still have my ink pad shelf that I got off of Craigslist.  I have two sets of Stampin Up ink pads and markers, one set of reinkers and one set of craft reinkers for all the Stampin Up current colors.  I have some of my markers, reinkers and inkpads over at my main workstation.  This table below my ink shelf is where I have smaller classes and where I can spread out when need be.


Below, this photo is of my workstation, which has evolved since we built it.  I couldn't find what I was looking for within my budget so I designed this and my husband and I built it.  On the top shelf, I have miscellaneous supplies in the boxes and in the middle, I have most of my current Stampin Up stamp sets. 


This area in the middle of my workstation has a shelf that includes all my punches, most of my embellishments, some reinkers, ink pads, glimmer mists, and other tools that I need handy when I am working and doing videos.  As you can see, I have my camcorder  mounted above my workdesk to shoot videos.  Directly below my heat gun is a small remote for my camcorder.  On the sides are cubbies that hold my current catologs, reference book, and envelopes of paper and projects I am currently working on. 


Here is my workstation inkpad and small punch storage.  I used the large inserts for the Big Shot storage boxes.  I simply placed them into the shelf at a slight angle and screwed over the top lip of the insert.  My small punches also fit well into these inserts. 


Here is the drawer under my workstation, I keep many tools I need to have easy access


Tuesday, April 5, 2011

Update on Scrapbook Closet Redo

Hey Stampers,

We have made some progress since last I wrote regarding the closet redo in my scrapbook room and my upstairs workshop area.  Everything is still not put back together back together but I thought I would show you our progress so far.  It would be completely done but my back went out right in the middle of the redo.  That slowed me down a bit but I am a tenacious lady and when I get something in mind not even a bad back can stop me completely.   Plus my husband had a bit of a meltdown late Sunday afternoon when the desktop got wedged into the closet because it was a tad to big and we like to never got it out again LOL.  I laughed then too but he didn't see the humor in the situation at all.  He was laying on the floor of the closet trying to kick it out of it's wedged position.  Half an inch can make a huge difference in whether it will fit or not.  I seriously thought about taking a photo to share but decided it might not go over too well LOL.  I think it would have made for a hilarious show for "Renovation Realities" on DIY Network.  It never goes as easily as I see it going in my mind's eye. 


Over all closet view


My photo studio side


My Big Shot Station LOVE IT!


My Workshop Desk Area
This is what wouldn't fit in my closet but I am happy with outcome.


My workshop area


There is a lot left to be done but it is coming along considering all the challenges we faced!  My husband told me it was going to be while before I could talk him into another DIY project but for now I am happy.  Let me know what you think!

Until Next Time,
Happy Stampin!

Saturday, April 2, 2011

Closet Make Over Before Photos

Hi Stampers!

So the makeover begins!  I have to admit I got home and started putting my Ikea pieces together yesterday and started worrying.  All the pieces just didn't look right and I tried every combination and it just wasn't working.  Finally, I went to bed feeling a bit discouraged to say the least!  After all I had been writing article and getting all of you pumped up to see this amazing new closet in my scrapbook room.  Not to mention traveling 4 states to go to an Ikea!

This morning, I returned to tackle the closet and finally realized there is a solution.  As I am writing this article my hubby is at the hardware store picking up a couple other items that is going to make this work.  Not only will I have the closet of my dreams I will also have a great office space upstairs in my Stampin Up workshop area.  Yes.... I have two rooms in my home dedicated to my scrapbooking and stamping.  I am spoiled rotten LOL!  It is going to be a lot of work this week to get this pulled together by Saturday but I am going to give it my best shot.

We are getting ready to start painting the closet as soon as my hubby gets home and then we can start putting the closet together tomorrow.  Whew it is going to be alot of work but I am excited and look forward to showing you the outcome.  Here is a photo to let you know what we are starting with.  I just got finished spackling the holes (there were a lot of them) that were in the closet.  Also after I finally convinced my hubby to let me, I removed the doors to open up the area better.


I will keep posting to to show you the progress.

Until Next Time
Happy Stampin!

Wednesday, March 30, 2011

Trip to Ikea

Hey Stampers!

I was in organizational heaven today while at Ikea. Wow what a blast I had picking out my new scrapbook closet. My sweet hubby let me get all I needed to outfit the closet in my scrap room. As some of you may have noticed I removed photos of my scrapbook room from my blog because it does not represent what my room is truly like now. Since I have become a Stampin Up demonstrator I have gotten rid of 99% of my old supplies. I have made my "workstation" to accommodate my all Stampin Up supplies and it is like a pilot's cock pit where I can easily reach everything I need while I am letting creative juices flow! I am going to use my closet as my photo studio and have moved my printer and some other things I still need but found aren't as important as my Stampin Up supplies.

Another goal I had when I planned my trip to Ikea was I wanted a functional Big Shot station, where I can have it and all my dies easily accessible. I love my Big Shot and I use it daily. I am going to shoot another video and upload new photos as soon as it is all finished. It will be awesome and I can't wait to show you what I have been up to.

I will keep you all posted!

Until next time,
Happy Stampin!

Tuesday, March 29, 2011

Ikea Adventure

I am in Frisco Texas and planning a big trip to Ikea! My plans are to do some reorganizing in my scrapbook room and completely redo my closet space. I am planning two days here and can't wait to get to shopping! I hope I can sleep tonight! I will keep you all posted!

Until next time!
Happy Stampin!

Tuesday, January 18, 2011

Punch Storage


Update: Punch Storage Units for sale, check out my page (Click here on link) "Punch Storage Units For Sale" to see my new line of Punch Storage Units available for sale!


Hey Scrappers!
Wow has it been a long time since I wrote anything about organization or what?? I have been focusing on doing Stampin Up videos and projects and have also been out of town quite a bit helping my mom out. Hopefully things will settle down soon and I can get back into writing more articles about organizing, especially since I really love to organize my scrapbook room and it is why I originally started this blog.

Today's topic is punch organization. I have personally tried many different ways to store my punches and thought I would share some with you. Punch storage for me has been a real challenge, so much so that I even designed a punch carousel to house my punches when I first started scrapbooking. Since I did not have many punches at the time it was ideal. But as my punch collection grew, I quickly had to come up with other solutions. I found that my new larger punches did not fit well on the carousel. I have to admit I was really proud of my punch carousel that I personally designed and built myself, and it worked well for quite a while. As my punch collection grew, I realized that I needed to figuire out something esle for storing my punches.


If you have been following my blog for long you will know, I love yard sales! I was lucky enough to find this rack, on the left side of photo, at a yard sale for only $4. I don't know what the rack was originally used for, but it worked. I actually still use this rack for punches that are not Stampin Up punches and I think I could use for my Birth Right classes.

On a trip a year to so ago to visit family in Virginia, I bought some of the Bygel Rails from Ikea and have had them sitting in my closet for months. So I finally got around to hanging them. My husband wasn't crazy about me hanging all these on the wall, so I came up with another solution.


Isn't this awesome?? I thought so, until I bought out a Stampin Up Demonstator who had about 60 punches for sale. Once again I didn't have room for them all! ARGGHHHH! I know all of you who are obessive organizers out there can relate! This was beautiful but I quickly outgrew it. Good thing I didn't put all the holes in the wall huh? Although I could have continued to use this, I would have had all my punches scattered around the room. This was one of the problems, I was trying to work out, especially since I have started doing tutorial videos for Stampin Up products. I always had my work area covered with punches all the time because it wasn't convenient to keep getting up and down to get another punch.

I actually spend a lot of time just sitting in my craft room trying to figure out how to best organize it. I really try to think out of the box, when organizing it. One of the items I got in the punch lot was a heavy duty paper filing cart. I started thinking what if I turned it over, would my punches fit?

They fit perfectly! Now I have all my old style Stampin Up punches here on this cart. It is on wheels and right next to where I do videos and most of my scrapbooking. Although I don't have all my punches on the cart, it is an awesome solution and works well for now. Since this cart was designed to hold files, I had to get creative in order to use the other parts of it. I found that by putting plastic shoe boxes that I had, I could then utilize the empty space in the middle of the cart. Here I hold stamp sets that need to be put up in the box on the left side. In the middle box, I keep ink pads I am using. They don't get put up often can you tell??? LOL! In the box on the right, I keep projects that I am currently working on and that are not finished. Since there was not a shelf on the bottom either, I used some metal pieces from a 12x12 paper storage rack and attached it with zip ties. I keep miscellaneous stuff down here while and am working on projects.

Ok I know you were wondering where the rest of the punches were! Since I sold most of ink pads and other supplies when I became a Stampin Up demonstator, I was able to alter this shelf to house my other punches. On the left, I removed some of the shelves and my new style punches fit perfectly and I have room to grow! I love the way these new punches are shaped because it will make for easier storage solutions in the future as I replace the older style of punches. On the bottom shelf, I put two curtain rods that cost only $1 each and put my smaller punches there for now. I used more curtain rods to sit my Stampin Up embellishments on. For now, this works well and I have everything with in easy reach.

I have done quite a bit of research to find storage solutions and wanted to share some more ideas with you. Last weekend while at the Container store, I came across this shoe rack I thought would be a great solution for someone who is looking for a punch storage solution. You could easily put all you smaller punches and border punches on the bottom and on top put your larger punches. This shoe rack is only $29.99 and would hold tons of punches! If you don't have a Container Store in your area, you can probably order this online.

This next photo is of my daughter, Amy's punch storage. She lives in Richmond, VA area and is a couple hours away from Ikea. She has her whole room decked out in awesome pieces all from Ikea. Ikea has the Bygel rail system and it is really inexpensive. Unfortunately, you can not buy these online from Ikea. If you are wondering where you might put these rails up in your own scrapbook space, you might consider wall space behind a door or even attached to a door. You might even have a shelf like I do and put the Bygel rails in it.

Another possible solution for punch storage are the over the door shoe rack holders. These are easy to find and pretty cheap solution for punch storage.

Most of us have had a challenge with finding solutions regarding our punch storage, but I hope maybe I have given you a few fresh ideas. Let me know if you have a solution that works well for you.

Until Next Time,
Happy Scrappin!

Friday, August 27, 2010

Check out Before Photos of Carolyn's Scrapbook Rooms

Hello Scrappers!

I went to see Carolyn on Wednesday and she is so excited about her new scrapbook space! We both had notes ready to go when I arrived and got right to work. We discussed several things, such as; how she scrapbooks, what her needs are, how she currently stores her items, and much more. We measured her new room and it is roughly 24 feet long x14 feet wide on one side, and on the other side the wall is about 30 feet long.


Carolyn was a very good sport to let me take photos of her room upstairs as is--before any of the furniture was moved out--and the fact that her closet rod had broken and all the clothes got piled onto the bed!  So thank you, Carolyn, for letting me do that!  You are such a dear, sweet lady.  Carolyn is lucky enough to have family who have promised to paint her room for her over the next couple of weeks.  She is wanting an apple green color on all the walls with white on all the ceiling.  We spent today trying to find her "perfect" apple green, so I guess we will wait and see what it really turns out to be!  LOL  That's for you, Carolyn hehe.


In Caroyln's current scrapbook room, there are several pieces that are working well for her, such as three small black bookshelves.  The bookshelves are approximately 31" H x 30" W x 11.5" D, and she got them at Wal-Mart for under $20 each.  We decided to work with these shelves and went to our local Wal-Mart and bought 4 more for $15 each (got to love the roll-backs at Wal-Mart)!  We plan to line these shelves up along the wall opposite the stairs and put a shelf over them all, and hopefully give them a built-in look.  We have not figured out exactly how to accomplish that, but that is out plan.  Any suggestions you might have or photos of how you may have accomplished this in your own space would be welcome.

Carolyn has several 3-drawer Sterite containers, and in these drawers she stores some of her supplies by theme, and some by designer series.  We are still contemplating where to put these and welcome any suggestions you have, since they also work very well for her scrapbooking needs.  In her current space, all she has to do is turn around to get her supplies, so with this much larger space upstairs, it will be an adjustment for her to have to move across the room to get her supplies.  She also has a small folding table she currently works on and has two more tables like it, which we were thinking we could use to create a crop area in the center of the room. 

To my surprise, she purchased a black kitchen island at Big Lots to use as her main work area for $229.  It has a butcher block top with a inlaid piece of granite off to one side.  On one of the long sides there is a section that can be flipped up to add more work space when needed.  We are thinking of placing the island in front of the window, out towards the middle of the room.
She has a computer desk that she would like to put up there, but we are not sure whether it can be disassembled and reassembled, or where it would fit.  Another interesting piece she has is a metal gray office cabinet that she keeps in her closet.   It has 30 drawers in it and this is where she keeps all her memorabilia that inspires her layouts. Each drawer has a tag slot to let her know what is in each drawer. (Not shown in photos).
She uses large plastic project boxes that come in multiple colors with handles, to store more of her supplies and projects she is currently working on. Her existing tiny room serves a lot of functions and I am amazed how well she has managed in that small space, especially considering how many supplies she has!  She does plan to purge before moving upstairs, so we will see what she has and what I can buy from her!  Let's hope she purges some good stuff!


Debbie's Space
 
It turns out that she is going to create a second workspace for her daughter, Debbie, in the space around the stairwell.  Debbie already has many nice white storage cubes, with drawers, paper shelves, that she got from Michaels.  We are going to put all the cubes stacked in the same place she now has her stuffed animals.  On the other half wall facing the stairwell, we will put her a nice L-shaped work area, using more cubes as a table base.  As you can see below, Debbie has a good amount of supplies herself, and it looks as if these pieces should fit quite nicely into this area.

I have to admit is is a bit overwhelming to help someone else figure out their scrapbook room and to make sure there is adequate storage for all her supplies!  We have a big challenge before us, but we are both very excited about the process and the end result!  We are both looking forward to your suggestions and ideas.  You can post a comment below or email any ideas, photos or drawings you have to shargod@gmail.com

Until the next time,
Happy Scrappin!


Sunday, July 25, 2010

Crafty Storage Features "Sharon's Scrappy Space!

Hello Scrappers,

I am thrilled to announce that Crafty Storage has featured my blog!  I am so honored!  I LOVE Crafty Storage and when my blog grows up I want it to be just like that blog!  Totally awesome blog and it has some really great thrifty ideas on crafting storage. 

Thank you all for your kind comments and I hope to hear from all of you soon!  Happy Scrapping!