Hello Scrappers!
I have to admit I feel like I have been neglecting my blog lately, but life has kept me busy for the last couple weeks. So I thought I would share with you some of what I have been up to.
A couple of weeks ago, I got a email from an organization called Birthright of Memphis, and they were looking for someone to teach scrapbooking classes. It certainly peaked my interest and I called them and went in to talk to their Director, Vickie Hardesty. She explained what Birthright is all about. Frankly, I was very impressed, by all they do and decided to volunteer to teach the classes.
Birthright of Memphis is a non-profit organization that helps pregnant women who are low-income and have little or no support from family. Some of these women have chosen not to have abortions through counseling from Birthright. Birthright helps these women through effective parenting classes, help with finding homes when necessary, help with obtaining higher education, along with providing free counseling and pregnancy testing, etc. The organization helps these women not only through their pregnancies but through the first three years of their child’s life. They provide maternity clothing and clothing for their babies, baby beds and other essential needs for the expectant mother. This is only a small part of the services they offer free of charge to these women.
Birthright of Memphis decided to start these scrapbook classes to help the women bond with their babies by creating a “Life Book” scrapbook for their child. Many of these women don’t have family roots or even see a future for themselves. Birthright is using the creative tool of scrapbooking to give these women hope and a future, giving their babies roots, something that has been missing in many their lives.
The first class was last Tuesday, and it was so much fun and very rewarding. The women were all so enthusiastic about doing their babies scrapbooks. It was a big class and out of the 17 women who signed up for the class, 14 came. I decided to make the layouts kits, to make it easier for them to create their "Life Books". Let me tell you, I had the Cricut working overtime! We have a total of 8 classes scheduled and have two-page layouts scheduled for each 50 minute class. Ok, I know, that is a short time to do it! I am planning on doing easy layouts that can be put together quickly and what they don't finish in class, they can finish later at home.
One of my biggest challenges in putting together layouts, was they had very few supplies, to work with. All the scrapbook supplies for the "Life Books" are donated. Fortunately, they did have the scrapbook albums already donated, which was a true blessing. Also, Carolyn, whose scrapbook room redo is featured on my blog, donated some paper and a few other things to help out to get me started. Between Carolyn's donation and what I donated, I managed to get 18 layout kits for the first and last pages of the scrapbook put together. I assembled one of the layout kits to give them an idea of how to start. I was so impressed, not one woman in the group did their layouts exactly like mine.
Interestingly enough, the day I called Birthright about the teaching position, I got a call from a Stampin Up Demonstator named Alice. She had heard through one of my customers, that I was selling scrapbook items for bargain prices and called me. Alice and I have talked on the phone several times since that first call and eventually I told her about the need for scrapbook supplies for Birthright of Memphis. Alice jumped in both feet first and started making calls, and one of those calls was to Stampin up headquarters in Utah. She found out how to request a donation and gave me all the information to do it. I am so excited to tell you all that Stampin Up approved the request within a couple days! I don't know what supplies they will send to Birthight but I am thrilled and feel totally blessed.
Stampin Up is an awesome company who is obviously very generous. I am so impressed how Stampin Up saw the needs of Birthright of Memphis and got on board to help out. Thank you so much to Stampin Up for helping out such a worthy cause.
I am so honored to be to be a part of Birthright of Memphis and to be able to share in the experience of these women's lives by helping to create their "Life Book" scrapbooks for their babies. Through all this, I have realized that through anything we love to do, like scrapbooking, we can make a difference in other people's lives. One day, these babies will see their roots through their "Life Books". How amazing is that? I never dreamed when I started this blog and the mission to help offer affordable scrapbook supplies to women who might not be able to scrapbook otherwise, it would take me in the direction it has.
Thank you again to Stampin Up, Alice and Carolyn for donating your time, efforts and supplies to help out for this worthy cause! I hope that you all will be truly blessed for your efforts.
If you have donations you would like to make to Birthright of Memphis or you would like to know more about them, check out their website: http://www.birthrightofmemphis.org/aboutus.htm
Until next time,
Happy Scrappin!

Wednesday, September 15, 2010
Monday, August 30, 2010
Zoe's "Scrap-Happy Space"
Hello Scrappers!
 I am thrilled to share with you, Zoe's scrap closet, which she fondly calls her "Scrap-Happy-Space". She with the help of her husband's handy skills, created this scrappy space in a closet in their home and on a budget! Her husband bought all the plywood and made the shelves and desk. he used shelf brackets mounted to the wall, to hang the shelves. Zoe bought all the cubbies at Micheals to complete her closet scrap happy space.
Another possibility is to use 3/4" MDF (4'x8' ft sheet around $25) instead of plywood. MDF (medium density fiberboard) is a great product and you see it used on HGTV all the time for low cost projects. It is a strong, durable material and I use it for all my building projects.
Another option would be to buy ready-made shelves (usually found found in the closet section at hardwood stores). Using these ready made shelves would not require the need for extra tools and painting. This would be a bit higher in cost and you would not have the custom fit that Zoe's space has, but if you don't have the tools and a handy husband, this would certainly work. All you need are a few basic tools, like a hammer, drill bit, wall anchors, and a drill. I believe every woman should have some basic tools and know how to use them!
Zoe's space is a perfect example of how you can have a great scrapbook space in a closet. Most of us would prefer to have a whole room, but when space is limited, this would be a perfect solution! One of the benefits to a scrap closet is when you are in the middle of a project and need to stop, you can simply close the doors! Not only is this practical, but it is beautiful.
 As you can see, Zoe has a place for everything and she found some great buys on the storage containers and boxes. She got the colorful boxes, she stores stickers and embellishments, at Ross for $6 each. The two large glass jars with ribbons in them were found at a garage sale for $1 each. The cute, altered lunch box (on tops of the purple box) was from a dear friend. How cute is that? The row of clear plastic boxes below the lower shelf are baby food containers, where she stores her embordery thread. Since she has a sweet 9-month old baby girl, that has to eat anyway, these were free! You are one very creative lady, Zoe!
On the desktop, she keeps her Personal Cricut on the left side of her desk and her sewing machine on the right. Which leaves the middle area open for all her workspace. She has metal wall mounts attached to wall to hold up her shelves and used them to attach magnetic metal spice containers right to one of them! I love this idea. What would be a totally useless space and not so attractive, she has made an asset. Behind the sewing machine, Zoe has a magazine holders to hold all her small paper stacks, tools, and current photos she wants to scrap.
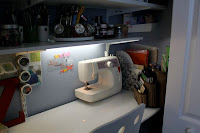

 On her work space, Zoe keeps special momentos that inspire her, such as the red Z, a rock with the word "imagine" on it, and her very close to her heart photo of her and her dad. How sweet is that?
 Zoe has put cubbies on both sides of the shelf above her work area. On the left side she has slots to hold her acrylic stamps in a binder and shelfs to hold embellishments and paints. You can buy the small cubed shelves at Micheal's for about $30 each, but wait until you have a coupon for 40-50% off and you will have a real bargain! Zoe has several of these cubbies and they are cute and works well for all her storage needs. The cute, green boxes she found at Goodwill for $1 each. As you can see, she has more of the magnetic spice containers on the wall.


 On the right side she keeps all her 12x12 papers, paper pads, and finished layouts. In the orange folder is where she keeps all her paper scraps. I am truly amazed at her organization in her small space!
Even under her desk she has utilized the space well. On the right, she has a rolling cart with drawers to keep miscellanous supplies such as bigger tools, cards, envelopes, beads, and brads, etc. She uses this cart to wheel out to dining room when she has crops. On the left she has these stackable cubes to store more of her supplies.


 In the top stackable cubes under her desk, she has a "thinking spot" where she keeps her layouts she is currently working on. I like this concept and will have to create a "thinking spot" of my own!
 Her ribbon drawer is her "eye candy" drawer. She is converting her storage from spools to cards to have more room. There is not much prettier thing to a scrapbooker than a nice colorful drawer of ribbon.
Ink and stamp storage in these drawers. She also has a scrap drawer where in one quick sweep she can put it all in one drawer after she is finished working on a layout.


 What a beautiful space, Zoe and her husband, have created. Thank you so much for sharing it with us. I love it and know there is somone out there who will be so inspired that they will have to create their own "scrap-happy space" scrap closet.
Check out Zoe's blog
Until next time,
Happy Scrappin!

Another possibility is to use 3/4" MDF (4'x8' ft sheet around $25) instead of plywood. MDF (medium density fiberboard) is a great product and you see it used on HGTV all the time for low cost projects. It is a strong, durable material and I use it for all my building projects.
Another option would be to buy ready-made shelves (usually found found in the closet section at hardwood stores). Using these ready made shelves would not require the need for extra tools and painting. This would be a bit higher in cost and you would not have the custom fit that Zoe's space has, but if you don't have the tools and a handy husband, this would certainly work. All you need are a few basic tools, like a hammer, drill bit, wall anchors, and a drill. I believe every woman should have some basic tools and know how to use them!
Zoe's space is a perfect example of how you can have a great scrapbook space in a closet. Most of us would prefer to have a whole room, but when space is limited, this would be a perfect solution! One of the benefits to a scrap closet is when you are in the middle of a project and need to stop, you can simply close the doors! Not only is this practical, but it is beautiful.

On the desktop, she keeps her Personal Cricut on the left side of her desk and her sewing machine on the right. Which leaves the middle area open for all her workspace. She has metal wall mounts attached to wall to hold up her shelves and used them to attach magnetic metal spice containers right to one of them! I love this idea. What would be a totally useless space and not so attractive, she has made an asset. Behind the sewing machine, Zoe has a magazine holders to hold all her small paper stacks, tools, and current photos she wants to scrap.


 On her work space, Zoe keeps special momentos that inspire her, such as the red Z, a rock with the word "imagine" on it, and her very close to her heart photo of her and her dad. How sweet is that?
 Zoe has put cubbies on both sides of the shelf above her work area. On the left side she has slots to hold her acrylic stamps in a binder and shelfs to hold embellishments and paints. You can buy the small cubed shelves at Micheal's for about $30 each, but wait until you have a coupon for 40-50% off and you will have a real bargain! Zoe has several of these cubbies and they are cute and works well for all her storage needs. The cute, green boxes she found at Goodwill for $1 each. As you can see, she has more of the magnetic spice containers on the wall.
To save on space she has created a binder where she stores her all her acrylic stamps, embossing folders and dies. She actually got these plastic sheets she used to put her acrylic stamps on, and pocketed plastic binder sheets at her work place and repurposed them to fit her needs. I wonder if you can get me some of these?!? Just kidding! Well, maybe not.


Even under her desk she has utilized the space well. On the right, she has a rolling cart with drawers to keep miscellanous supplies such as bigger tools, cards, envelopes, beads, and brads, etc. She uses this cart to wheel out to dining room when she has crops. On the left she has these stackable cubes to store more of her supplies.


Ink and stamp storage in these drawers. She also has a scrap drawer where in one quick sweep she can put it all in one drawer after she is finished working on a layout.


Check out Zoe's blog
Until next time,
Happy Scrappin!

Friday, August 27, 2010
Check out Before Photos of Carolyn's Scrapbook Rooms
Hello Scrappers!
I went to see Carolyn on Wednesday and she is so excited about her new scrapbook space! We both had notes ready to go when I arrived and got right to work. We discussed several things, such as; how she scrapbooks, what her needs are, how she currently stores her items, and much more. We measured her new room and it is roughly 24 feet long x14 feet wide on one side, and on the other side the wall is about 30 feet long.


Carolyn was a very good sport to let me take photos of her room upstairs as is--before any of the furniture was moved out--and the fact that her closet rod had broken and all the clothes got piled onto the bed! So thank you, Carolyn, for letting me do that! You are such a dear, sweet lady. Carolyn is lucky enough to have family who have promised to paint her room for her over the next couple of weeks. She is wanting an apple green color on all the walls with white on all the ceiling. We spent today trying to find her "perfect" apple green, so I guess we will wait and see what it really turns out to be! LOL That's for you, Carolyn hehe.
 In Caroyln's current scrapbook room, there are several pieces that are working well for her, such as three small black bookshelves. The bookshelves are approximately 31" H x 30" W x 11.5" D, and she got them at Wal-Mart for under $20 each. We decided to work with these shelves and went to our local Wal-Mart and bought 4 more for $15 each (got to love the roll-backs at Wal-Mart)! We plan to line these shelves up along the wall opposite the stairs and put a shelf over them all, and hopefully give them a built-in look. We have not figured out exactly how to accomplish that, but that is out plan. Any suggestions you might have or photos of how you may have accomplished this in your own space would be welcome.
Carolyn has several 3-drawer Sterite containers, and in these drawers she stores some of her supplies by theme, and some by designer series. We are still contemplating where to put these and welcome any suggestions you have, since they also work very well for her scrapbooking needs. In her current space, all she has to do is turn around to get her supplies, so with this much larger space upstairs, it will be an adjustment for her to have to move across the room to get her supplies. She also has a small folding table she currently works on and has two more tables like it, which we were thinking we could use to create a crop area in the center of the room.
 To my surprise, she purchased a black kitchen island at Big Lots to use as her main work area for $229. It has a butcher block top with a inlaid piece of granite off to one side. On one of the long sides there is a section that can be flipped up to add more work space when needed. We are thinking of placing the island in front of the window, out towards the middle of the room.
 She uses large plastic project boxes that come in multiple colors with handles, to store more of her supplies and projects she is currently working on. Her existing tiny room serves a lot of functions and I am amazed how well she has managed in that small space, especially considering how many supplies she has! She does plan to purge before moving upstairs, so we will see what she has and what I can buy from her! Let's hope she purges some good stuff!
Debbie's Space
 It turns out that she is going to create a second workspace for her daughter, Debbie, in the space around the stairwell. Debbie already has many nice white storage cubes, with drawers, paper shelves, that she got from Michaels. We are going to put all the cubes stacked in the same place she now has her stuffed animals. On the other half wall facing the stairwell, we will put her a nice L-shaped work area, using more cubes as a table base. As you can see below, Debbie has a good amount of supplies herself, and it looks as if these pieces should fit quite nicely into this area.


I went to see Carolyn on Wednesday and she is so excited about her new scrapbook space! We both had notes ready to go when I arrived and got right to work. We discussed several things, such as; how she scrapbooks, what her needs are, how she currently stores her items, and much more. We measured her new room and it is roughly 24 feet long x14 feet wide on one side, and on the other side the wall is about 30 feet long.


Carolyn was a very good sport to let me take photos of her room upstairs as is--before any of the furniture was moved out--and the fact that her closet rod had broken and all the clothes got piled onto the bed! So thank you, Carolyn, for letting me do that! You are such a dear, sweet lady. Carolyn is lucky enough to have family who have promised to paint her room for her over the next couple of weeks. She is wanting an apple green color on all the walls with white on all the ceiling. We spent today trying to find her "perfect" apple green, so I guess we will wait and see what it really turns out to be! LOL That's for you, Carolyn hehe.

Carolyn has several 3-drawer Sterite containers, and in these drawers she stores some of her supplies by theme, and some by designer series. We are still contemplating where to put these and welcome any suggestions you have, since they also work very well for her scrapbooking needs. In her current space, all she has to do is turn around to get her supplies, so with this much larger space upstairs, it will be an adjustment for her to have to move across the room to get her supplies. She also has a small folding table she currently works on and has two more tables like it, which we were thinking we could use to create a crop area in the center of the room.
 To my surprise, she purchased a black kitchen island at Big Lots to use as her main work area for $229. It has a butcher block top with a inlaid piece of granite off to one side. On one of the long sides there is a section that can be flipped up to add more work space when needed. We are thinking of placing the island in front of the window, out towards the middle of the room.
She has a computer desk that she would like to put up there, but we are not sure whether it can be disassembled and reassembled, or where it would fit. Another interesting piece she has is a metal gray office cabinet that she keeps in her closet. It has 30 drawers in it and this is where she keeps all her memorabilia that inspires her layouts. Each drawer has a tag slot to let her know what is in each drawer. (Not shown in photos).
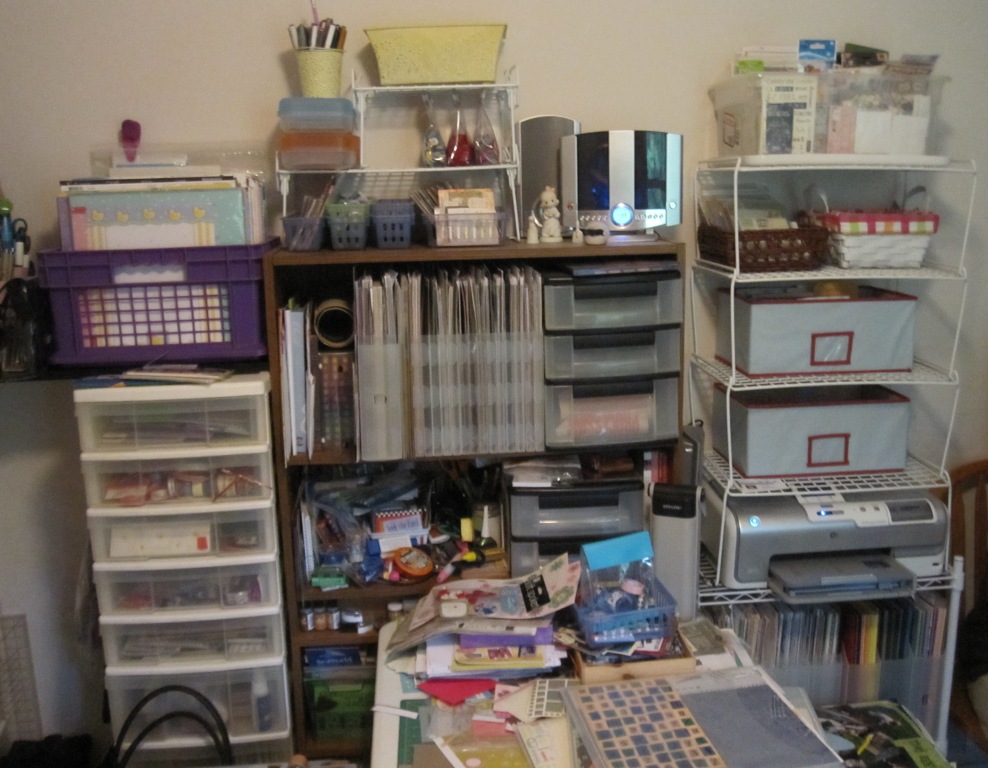
Debbie's Space


I have to admit is is a bit overwhelming to help someone else figure out their scrapbook room and to make sure there is adequate storage for all her supplies! We have a big challenge before us, but we are both very excited about the process and the end result! We are both looking forward to your suggestions and ideas. You can post a comment below or email any ideas, photos or drawings you have to shargod@gmail.com!
Until the next time,
Happy Scrappin!
Monday, August 23, 2010
Carolyn's New Scrapbook Room
I met a new friend named Carolyn at my scrapbook sale. She and I hit it off immediately and she has agreed to let me help her set up her new scrapbook room. She is moving her scrapbook supplies from a smaller room to larger room upstairs. She needs some solutions for how to set up her new space. She wants to use most of her existing pieces and do all this on a budget.
All through the process over the next few weeks/months, I will post photos of the progress of the move from the old her scrapbook space to her new space. I will give Carolyn's Scraproom Makeover, her own page on my blog as it will be a long exciting process! I will let you know when I post new photos and articles about her new space!
I am encouraging you to share your ideas with us and maybe we might just use them! It will be a lot of fun and hopefully we all grow closer together throught the process of creating her new room!
We are starting this Wednesday, so you will be hearing from us soon!
Until then,
Happy Scrapping!
All through the process over the next few weeks/months, I will post photos of the progress of the move from the old her scrapbook space to her new space. I will give Carolyn's Scraproom Makeover, her own page on my blog as it will be a long exciting process! I will let you know when I post new photos and articles about her new space!
I am encouraging you to share your ideas with us and maybe we might just use them! It will be a lot of fun and hopefully we all grow closer together throught the process of creating her new room!
We are starting this Wednesday, so you will be hearing from us soon!
Until then,
Happy Scrapping!
Show Me Your Scraproom Spaces
Hello Scrappers!
Most of us would love to go out and buy all the latest and greatest in scrapbook furniture and storage pieces, but that is not an option for many of us. By sharing your spaces, you can inspire others and give them ideas on how to better their spaces! We would love to hear about great storage pieces you created out of something unexpected. Or about a great roadside find or bargain you found at Goodwill, Craigslist, yardsale, or some place else that has been added to your scraproom.
Many of you are like me and budget conscience! Some of you may look at my scraproom space and think I did it all at once. That is not true, I had to build on my space a little at a time as my supplies grew and my budget allowed. When I designed and built my scrapbook workstation, I had already looked for an inexpensive piece of furniture and couldn't find exactly what I needed. That is when I decided to design the workstation. I was convinced this was all I would ever need for all my scrapbook organization. I convinced my husband of how it would blend in nicely with the bedroom furniture and only cost around $300 to $350. It would be perfect!! Let me tell you it was a LOT of hard work and it took hours and hours on the computer designing it. I also had to figure out how to cut all the pieces with the fewest sheets of MDF possible (3/4" medium density fiberboard). After designing it, it took us over a week of 16 hour days on my part and all my husband after-hours time to build and install it. We are not all that handy at building but we managed to do it. Someone who is handier could have done it in much less time, I am sure! As you can see my supplies did eventually outgrow my workstation and I eventually did take over the whole room. My scrapbook room wasn't done over night, it evolved as my storage needs grew. It took a lot of time and effort to find creative solutions. If I couldn't find what I was looking for, I built it and I did a lot of painting.
 Here is another example of how I have had to learn to think creatively when I was looking for a storage solution for my large punches. My punch carousel wasn't working for them and would hold only border and small punches (I didn't think that into the plan when building it!). I go to a lot of yard sales and one day I came across this wire rack in photo to left. I don't even know what it was intended for in the first place but I thought it had potential. It was $5 and I wasn't sure if it would work for storing my punches so I haggled a bit and got it down to $4 and sure enough it work! If it hadn't I figured I could sell it in my next yard sale for $4!
Let me say, I have totally enjoy sharing my Scrappy Space with you, but I and all my readers would love even more if you would share your scrapbook rooms, closets and areas you work in. Whether you have a beautiful scrapbook room or still working on trying to organize it, we would love to see what you are up to.
If you are having some organization issues, I and my readers would love to offer some ideas to help you with your spaces. Send your photos and blog addresses (if you have one) to Shargod@gmail.com and I will post them and let's see what solutions we can come up with.
There are a few things you can let us know so my readers and I can help you better, for example:
1) What are your problems or storage needs with your current space? Can you not find things? Need a solution for paper storage? Are you looking for an inexpensive solution for a work space? Can't find a way to organize your stickers? What ever your problems are let us know. You can either just ask a question or send photos so we can better help you.
2) What is your budget? If you have no budget, then it is time to start looking around the house for what you can use or for the free items on Craigslist, or do some dumpster diving! Possibly your friends and family might be willing to donote a bookshelf or something else to help? If you have a small budget of say $100-$200, then we can look at inexpensive options for you.
3) Perhaps you don't even have a space! There are solutions for that as well, we just have to get creative and find a little nook, or a closet, or a possibly place to put a armoire or small desk to hide all your scrapbook supplies.
4) Having trouble getting organized? Many people get so overwhelmed trying to re-organize and don't know what to do. When I re-organize my space, I work in on one solution at a time, but it still gets pretty messy. I am the type of organizer that I just keep going until it is all done! That of course won't work for everyone. Others of you might have a better solution, that works better for another scrapper's problem. We all do things differently and what works for me or you might not work for everyone. I am encouraging comments and input from all of you to help find solutions to each other's storage and organizational issues.
I am sure there are many other challenges you might have that I have not listed. Please feel free to bring up any topic related to your own scrapbook challenges. We are all looking forward to hearing from you!
Be sure and tell your friends about Sharon's Scrappy Space!
Until next time,
Happy Scrapping!
Most of us would love to go out and buy all the latest and greatest in scrapbook furniture and storage pieces, but that is not an option for many of us. By sharing your spaces, you can inspire others and give them ideas on how to better their spaces! We would love to hear about great storage pieces you created out of something unexpected. Or about a great roadside find or bargain you found at Goodwill, Craigslist, yardsale, or some place else that has been added to your scraproom.
Many of you are like me and budget conscience! Some of you may look at my scraproom space and think I did it all at once. That is not true, I had to build on my space a little at a time as my supplies grew and my budget allowed. When I designed and built my scrapbook workstation, I had already looked for an inexpensive piece of furniture and couldn't find exactly what I needed. That is when I decided to design the workstation. I was convinced this was all I would ever need for all my scrapbook organization. I convinced my husband of how it would blend in nicely with the bedroom furniture and only cost around $300 to $350. It would be perfect!! Let me tell you it was a LOT of hard work and it took hours and hours on the computer designing it. I also had to figure out how to cut all the pieces with the fewest sheets of MDF possible (3/4" medium density fiberboard). After designing it, it took us over a week of 16 hour days on my part and all my husband after-hours time to build and install it. We are not all that handy at building but we managed to do it. Someone who is handier could have done it in much less time, I am sure! As you can see my supplies did eventually outgrow my workstation and I eventually did take over the whole room. My scrapbook room wasn't done over night, it evolved as my storage needs grew. It took a lot of time and effort to find creative solutions. If I couldn't find what I was looking for, I built it and I did a lot of painting.

Let me say, I have totally enjoy sharing my Scrappy Space with you, but I and all my readers would love even more if you would share your scrapbook rooms, closets and areas you work in. Whether you have a beautiful scrapbook room or still working on trying to organize it, we would love to see what you are up to.
If you are having some organization issues, I and my readers would love to offer some ideas to help you with your spaces. Send your photos and blog addresses (if you have one) to Shargod@gmail.com and I will post them and let's see what solutions we can come up with.
There are a few things you can let us know so my readers and I can help you better, for example:
1) What are your problems or storage needs with your current space? Can you not find things? Need a solution for paper storage? Are you looking for an inexpensive solution for a work space? Can't find a way to organize your stickers? What ever your problems are let us know. You can either just ask a question or send photos so we can better help you.
2) What is your budget? If you have no budget, then it is time to start looking around the house for what you can use or for the free items on Craigslist, or do some dumpster diving! Possibly your friends and family might be willing to donote a bookshelf or something else to help? If you have a small budget of say $100-$200, then we can look at inexpensive options for you.
3) Perhaps you don't even have a space! There are solutions for that as well, we just have to get creative and find a little nook, or a closet, or a possibly place to put a armoire or small desk to hide all your scrapbook supplies.
4) Having trouble getting organized? Many people get so overwhelmed trying to re-organize and don't know what to do. When I re-organize my space, I work in on one solution at a time, but it still gets pretty messy. I am the type of organizer that I just keep going until it is all done! That of course won't work for everyone. Others of you might have a better solution, that works better for another scrapper's problem. We all do things differently and what works for me or you might not work for everyone. I am encouraging comments and input from all of you to help find solutions to each other's storage and organizational issues.
I am sure there are many other challenges you might have that I have not listed. Please feel free to bring up any topic related to your own scrapbook challenges. We are all looking forward to hearing from you!
Be sure and tell your friends about Sharon's Scrappy Space!
Until next time,
Happy Scrapping!
Thursday, August 12, 2010
How to Develop a Scrapbook Organization System
Have you noticed how hard it is to organize your scrapbook supplies? Here are some tips that might help you to organize your space to work more efficiently for your needs.
Figuring out how you scrapbook is key to good organization. Are you always looking for your supplies and having trouble finding them? Try separating all your supplies into different categories like tools, metal embellishments, chipboard, markers, ink pads, paper, embossing supplies, stickers, rub-ons, stamps, flowers, etc. Find a way to store items together by category and make sure you have plenty of room to grow when setting up a system. For items you use often, store them close to your work area for easy access. If you use some supplies only occasionally you can store them further from your work area. But make sure they are easily accessible otherwise you may not use them as often.

 So are you like me and forget what supplies you have? Try making a list of supplies you have and carry it with you. I put my list on my iPhone Notes app. So no more buying the same bottle of Stickles, or that Over the Hill stamp, that you may already have. Another tip is to develop a reference system with photos in a large binder. My binder has photos of each Stampin' Up stamp set I have and is printed on white cardstock in sheet protectors. All my Stampin' Up sets are in one section of binder and my acrylic stamps in another section. My Stampin' Up sets are stored in boxes that are labeled Wood Stamps 1-12 (yes, I have 12 large boxes of them, and it's growing). Each Stampin' Up set is labeled with the box number to easily put it away.


All my acrylic stamps are in CD cases and are labeled by theme and alphabetized. If I have several CD’s with same theme, I label them by them theme and number (Flowers 1 and Flowers 2) and so on. I used the stamp package’s plastic sheet that has the images already on it and glued it on the cardstock in sheet protectors. I also label the images in a binder with same theme and number of the CD holders, so when I see the stamps I want to use in Flower 3 in my binder, all I have to do is go get Flowers 3. For acrylic stamps that won't fit in CD cases, I have them in page protectors in the binder. I keep all my acrylic stamps in CD cases in a small cabinet I got at Goodwill that has 2 small drawers where I keep my acrylic blocks. It was a lot of work to develop the system but now I can easily find what stamp I am looking for. I also have all my Cricut cartridge’s designs, Nestibilities and Cuttlebug embossing folders and die cuts in other sections of binder.
Try dividing all your stickers and rub-ons into themes so when you are making a baby themed card or layout, you can see your entire selection of baby related stickers and rub-ons. You can store them in boxes with themed dividers or make your own type of Clip It Up. Or you can do all the above like I did and then buy the Clip It Up! I recommend if you really want something just go buy it (when it's on sale!). In the long run, it will save you money! Funny, but true!


If you are limited on space or you are running out of space like me, try storing your paper vertically instead of horizontal. Cropper Hopper makes a new vertical storage paper holder and I am seriously thinking of converting my paper storage to these. I have to admit I am not crazy about the other more flimsy holder by Cropper Hopper, but the newer version will not fall over.
Another tip, when you buy something or just finish a project, have a place that you can stash supplies away if you don't have time to put them up. I have 2 buckets and 4 blue boxes for this. That is one way I to keep things in order and looking tidy. You never know when you might get an opportunity to show off your scrapbook space.


Remember to have a place for everything and have everything in its place and you will stay well organized. If you can't find it look in your stash buckets and boxes! By staying organized it doesn’t matter what I am looking for whether it is scrapbooking tool or embellishment, I can always easily find it. This doesn’t apply to just my scrapbook space but my whole house.
Figuring out how you scrapbook is key to good organization. Are you always looking for your supplies and having trouble finding them? Try separating all your supplies into different categories like tools, metal embellishments, chipboard, markers, ink pads, paper, embossing supplies, stickers, rub-ons, stamps, flowers, etc. Find a way to store items together by category and make sure you have plenty of room to grow when setting up a system. For items you use often, store them close to your work area for easy access. If you use some supplies only occasionally you can store them further from your work area. But make sure they are easily accessible otherwise you may not use them as often.

Are you someone who scrapbooks by color? Try organizing your papers and embellishments by color. Place all your scrapbook papers and embellishments that are the same colored supplies together in one drawer or container. If you scrapbook by theme then try putting all your themed items together and so on.
If you have difficulty putting layouts or cards together, try buying coordinating papers, stickers, rub-ons, chipboard, and embellishments from the same design line and storing them together in a project folder or box. There are many scrapbook kits on the market that make it really easy to do an entire album. Perhaps you only want to do a 2 page layout? When you pick the items in store or from your own supplies, put all the pieces together in a project folder. Once you are ready to do that layout, it is all ready to go. Sometimes it is best to stick with only three or four colors of paper and embellishments when putting a scrapbook together. Recently, I did a scrapbook for my daughter for her college graduation and I used only the colors of the university. It made putting the scrapbook together a breeze.
If you are like me, you are a visual scrapbooker, and I like to see what supplies I have, or I will forget what I have. For example, one day I wanted to make an over the hill birthday card for my brother-in-law who turned 50. I had a particular stamp in mind that I remembered seeing somewhere that I wanted to use; I just couldn’t remember where I saw it. After traipsing through every scrapbook and hobby store in the greater Memphis area and not finding it, I gave up and went home. Once I got home, I started looking through my own stamps for another stamp that would work and guess what? I had the very stamp I had spent all day looking for in my own collection! I knew I had seen it someplace! I can laugh about it now, at the time it wasn’t so funny. So believe me when I say I have learned scrapbook organization by trial and error!


All my acrylic stamps are in CD cases and are labeled by theme and alphabetized. If I have several CD’s with same theme, I label them by them theme and number (Flowers 1 and Flowers 2) and so on. I used the stamp package’s plastic sheet that has the images already on it and glued it on the cardstock in sheet protectors. I also label the images in a binder with same theme and number of the CD holders, so when I see the stamps I want to use in Flower 3 in my binder, all I have to do is go get Flowers 3. For acrylic stamps that won't fit in CD cases, I have them in page protectors in the binder. I keep all my acrylic stamps in CD cases in a small cabinet I got at Goodwill that has 2 small drawers where I keep my acrylic blocks. It was a lot of work to develop the system but now I can easily find what stamp I am looking for. I also have all my Cricut cartridge’s designs, Nestibilities and Cuttlebug embossing folders and die cuts in other sections of binder.
Try dividing all your stickers and rub-ons into themes so when you are making a baby themed card or layout, you can see your entire selection of baby related stickers and rub-ons. You can store them in boxes with themed dividers or make your own type of Clip It Up. Or you can do all the above like I did and then buy the Clip It Up! I recommend if you really want something just go buy it (when it's on sale!). In the long run, it will save you money! Funny, but true!


If you are limited on space or you are running out of space like me, try storing your paper vertically instead of horizontal. Cropper Hopper makes a new vertical storage paper holder and I am seriously thinking of converting my paper storage to these. I have to admit I am not crazy about the other more flimsy holder by Cropper Hopper, but the newer version will not fall over.
Another tip, when you buy something or just finish a project, have a place that you can stash supplies away if you don't have time to put them up. I have 2 buckets and 4 blue boxes for this. That is one way I to keep things in order and looking tidy. You never know when you might get an opportunity to show off your scrapbook space.


Remember to have a place for everything and have everything in its place and you will stay well organized. If you can't find it look in your stash buckets and boxes! By staying organized it doesn’t matter what I am looking for whether it is scrapbooking tool or embellishment, I can always easily find it. This doesn’t apply to just my scrapbook space but my whole house.
Until next time! Happy Scrapping!
Sunday, July 25, 2010
Crafty Storage Features "Sharon's Scrappy Space!
Hello Scrappers,
I am thrilled to announce that Crafty Storage has featured my blog! I am so honored! I LOVE Crafty Storage and when my blog grows up I want it to be just like that blog! Totally awesome blog and it has some really great thrifty ideas on crafting storage.
Thank you all for your kind comments and I hope to hear from all of you soon! Happy Scrapping!
I am thrilled to announce that Crafty Storage has featured my blog! I am so honored! I LOVE Crafty Storage and when my blog grows up I want it to be just like that blog! Totally awesome blog and it has some really great thrifty ideas on crafting storage.
Thank you all for your kind comments and I hope to hear from all of you soon! Happy Scrapping!
Monday, July 12, 2010
Scrapbooking on a Budget
As you can see from my scrapbook room photos, the room has evolved from its "one wall" and "closet". We did a renovation on our home last summer and added a screen porch on the back and finished off the upstairs room to make an extra bedroom. That was when I saw my chance to take over the whole room. I don't even think I had planned it, it just sort of happened. When I found the cabinet at the cabinet shop, I just could not resist. My husband has been so supportive and I love him for it. He helped me build my workstation and shelves and let me have the whole room. We have improved the "man cave" as well and I have supported his hobby of "ham radio" which isn't cheap either.
Later I found the desk on Craigslist for $100. It might not look like it was worth a $100 but before I painted it, it was beautiful. Kind of sad, that I did paint it but I am a woman on a mission to make a great scraproom. I found the chairs at yardsales for $10 and $5. (but have recently been on vacation where there was an "IKEA" and got three chairs for $23 each). If you follow my blog you will see that I am always changing it around. I think I have a need to redecorate and I just keep redoing my scraproom! Not that I haven't redone other rooms in the house! Remember I am a HGTV junkie!
Most of my supplies I have bought second-hand through yardsales and Craigslist. When I see a listing or yardsale, if it is good stuff I usually try to buy the lot for one price. I have gotten some amazing deals this way and bought most of my supplies for a fraction of the cost. If you have Craigslist in your area try searching for "scrapbook", "stampin up", or "stamps". Whatever is your passion search for it, keep checking because it can go fast. Most people who are selling go into this hobby and just let it sit, or now they need more room in their homes, or need the the money now.
Recently I bought a lot, it had to be worth $4000 $5000 retail and I got it for a mere $200. I bought it over the phone and she named the price! I didn't even try to talk her down, by the way I am a negoiater. She lived a couple hours from me and brought it to me the next day! I have been selling the excess and duplicates and have already made my money back, and added 50 Stampin Up sets plus a whole lot more to my supplies. I even set my daughter up to start scrapbooking and stamping. Aren't I a good mom?
This is a sample of what I bought once for $75 and that I actually took photos, this link will take you to one of my favorite websites and my gallery:
http://www.scrapbook.com/myplace/index.php?mod=galleries&u=404023&type=1&page=1
I have learned to look at items at Goodwill and yard sales and find creative ways to make them work for me. Such as..
 The little shelf in the middle I got at Goodwill for $10. The HP photo printer I got for $20 (I gave it to my mom and she has been having a blast printing photos) I got the heat gun for $1. I got the MM carousel for half off with a coupon at Michaels. The desk was $100 off Craigslist. I really like it because it is long and slim and I can pull it out when needed.
 My workstation I built for just under $300. The stamp storage unit cost me $10 of materials to make. I have lots of primer, white paint, and scraps of MDF.
 When this photo was taken, I had a custom clip it up on the top right two shelves which consisted of $1 curtain rods and some paper clips and small clothes pins. Really cheap! It worked until I found a one on sale. I made round dividers to sort my stickers. I have a lot of sticker don't I? No worries, I have add some and purged some. If I am not using something, I sell it or give it to my daughter.
 I got the two paper stands for $10 each and the wire stand to left $4 and it stores my large punches, most of which I got in the last lot I bought for $200. The slat board spinner display rack was $30. I had bought a bunch of slat board pegs when I got the paper racks for $2. I sure am glad I kept them now. Those things are expensive! I have a ton of them. The shelves in the sides of the closet I made from shelves from my workstation. I used to have them as paper shelves before getting these.
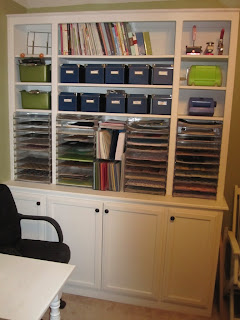
The plastic slackable paper trays I got for $2 each. I bought about 50 of them. I still have some stashed in attic but you never know I might need them. I got the little blue boxes at Walmart for cheap. I got a bit crazy and bought a bunch of them but I have you to know I am using all of them.
Needless to say, I am a scrapaholic and I love to reorganize my room, good thing because when I buy a "lot" of supplies and I usually have to make more room. I think I love organizing my room more than scrapbooking and stamping! My goal is to buy and sell to support my habit. Take a look in my Items for Sell List to see some of what I have for sell.
http://s909.photobucket.com/home/shargod63
Let me know what kind of great deals you have found and I may share them on my blog. Happy shopping!
Later I found the desk on Craigslist for $100. It might not look like it was worth a $100 but before I painted it, it was beautiful. Kind of sad, that I did paint it but I am a woman on a mission to make a great scraproom. I found the chairs at yardsales for $10 and $5. (but have recently been on vacation where there was an "IKEA" and got three chairs for $23 each). If you follow my blog you will see that I am always changing it around. I think I have a need to redecorate and I just keep redoing my scraproom! Not that I haven't redone other rooms in the house! Remember I am a HGTV junkie!
Most of my supplies I have bought second-hand through yardsales and Craigslist. When I see a listing or yardsale, if it is good stuff I usually try to buy the lot for one price. I have gotten some amazing deals this way and bought most of my supplies for a fraction of the cost. If you have Craigslist in your area try searching for "scrapbook", "stampin up", or "stamps". Whatever is your passion search for it, keep checking because it can go fast. Most people who are selling go into this hobby and just let it sit, or now they need more room in their homes, or need the the money now.
Recently I bought a lot, it had to be worth $4000 $5000 retail and I got it for a mere $200. I bought it over the phone and she named the price! I didn't even try to talk her down, by the way I am a negoiater. She lived a couple hours from me and brought it to me the next day! I have been selling the excess and duplicates and have already made my money back, and added 50 Stampin Up sets plus a whole lot more to my supplies. I even set my daughter up to start scrapbooking and stamping. Aren't I a good mom?
This is a sample of what I bought once for $75 and that I actually took photos, this link will take you to one of my favorite websites and my gallery:
http://www.scrapbook.com/myplace/index.php?mod=galleries&u=404023&type=1&page=1
I have learned to look at items at Goodwill and yard sales and find creative ways to make them work for me. Such as..


The plastic slackable paper trays I got for $2 each. I bought about 50 of them. I still have some stashed in attic but you never know I might need them. I got the little blue boxes at Walmart for cheap. I got a bit crazy and bought a bunch of them but I have you to know I am using all of them.
Needless to say, I am a scrapaholic and I love to reorganize my room, good thing because when I buy a "lot" of supplies and I usually have to make more room. I think I love organizing my room more than scrapbooking and stamping! My goal is to buy and sell to support my habit. Take a look in my Items for Sell List to see some of what I have for sell.
http://s909.photobucket.com/home/shargod63
Let me know what kind of great deals you have found and I may share them on my blog. Happy shopping!
Saturday, July 10, 2010
Why I created this blog...
Hey, Scrappers out there! I have created this blog to have a place to share ideas and storage solutions with others who have the same passion as I have for designing and redesigning (and redesigning) my scrapbooking room (Ok I admit, I may be a little OCD). When I first started scrapbooking a few years ago, I set up a small table and put up some shelves in my small laundry room, and thought this ought to do it. As my passion for scrapbooking grew over the next few weeks, so did my amount supplies and tools. I quickly ran out of room in my little laundry room. Besides, now the dogs live in there and it can get a bit little hairy!
After helping my husband to see the benefits of my moving into the "spare" bedroom, and how I could use "one wall" of the room and have the closet for extra storage, it was settled and I made the move. Having an eye for design, (too much HGTV) I realized instantly that my plastic table wasn't coordinating well with the bedroom furniture. Hmm... another dilemma.. well, the only solution was furniture to match of course! I am one of those matchy matchy types. So, being on a "budget" (because this wasn't going to get out of hand), I started the search for an inexpensive solution. Thinking I would find a workstation to match the bedroom furniture would be easy, I quickly realized "scrapbooking" and "inexpensive" don't go together, and there was no IKEA within a day's drive, I started Googling "scrapbook storage solutions" and "creative craft storage", etc. What I found was some great stuff that was way too expensive for me! Remember: I am keeping this within reason. Anyway, that was my intention.
After finding nothing within my budget, I decided to try to design something that would work, except I didn't have any design programs on my computer (not that I knew how to use one). So, I figured my best solution was Excel. I can do anything in Excel! It is the best program ever! Using each cell as a one inch square, I started designing my new scrapbook workstation. I spent days working on the perfect design and finally it was time to build it. I love power tools; everyone including women should have some! My husband and I went to the hardware store and decided that 3/4 inch MDF was the best option, plus "they" always use it on HGTV on all those shows that are budget-friendly. It all seemed so perfect until we realized that 4 foot by 8 foot sheets of MDF were too big to fit in our SUV. Hmmm... another delimma, so off we went to start shopping in discount furniture stores.
After an intense day of shopping for furniture that would work (at this point in my life I had never heard of Craigslist), or that was not too expensive, I was a bit discouraged as I sat down in the last furniture store to collect my thoughts. It hit me as I was looking at the too-expensive perfect piece of furniture: the hardware store had that "big saw" and they could cut it! Am I smart or what?? Don't answer that! So, off to home we went so I could figure how to have the hardware store cut the 6 pieces of MDF into 3 or 4 pieces per sheet that would fit in my car, while using as much as possible of each sheet. Don't ask me how I do this stuff it is just how my brain is wired!
So, off to hardware store we went again and this time with an Excel diagram of each sheet of MDF, showing how to cut each sheet. They were really happy seeing me coming, NOT! And after a long, long two weeks for my husband who agreed to help me, I had the workstation to match the rest of the furniture in the bedroom finally built. My husband will tell you that once I get an idea in my head there is no stopping me! I won't stop until it is done, working from morning to night for as long as it takes. He loves that quality about me, I am sure! LOL
That is how my obsession with my scrapbooking room began.
After helping my husband to see the benefits of my moving into the "spare" bedroom, and how I could use "one wall" of the room and have the closet for extra storage, it was settled and I made the move. Having an eye for design, (too much HGTV) I realized instantly that my plastic table wasn't coordinating well with the bedroom furniture. Hmm... another dilemma.. well, the only solution was furniture to match of course! I am one of those matchy matchy types. So, being on a "budget" (because this wasn't going to get out of hand), I started the search for an inexpensive solution. Thinking I would find a workstation to match the bedroom furniture would be easy, I quickly realized "scrapbooking" and "inexpensive" don't go together, and there was no IKEA within a day's drive, I started Googling "scrapbook storage solutions" and "creative craft storage", etc. What I found was some great stuff that was way too expensive for me! Remember: I am keeping this within reason. Anyway, that was my intention.
After finding nothing within my budget, I decided to try to design something that would work, except I didn't have any design programs on my computer (not that I knew how to use one). So, I figured my best solution was Excel. I can do anything in Excel! It is the best program ever! Using each cell as a one inch square, I started designing my new scrapbook workstation. I spent days working on the perfect design and finally it was time to build it. I love power tools; everyone including women should have some! My husband and I went to the hardware store and decided that 3/4 inch MDF was the best option, plus "they" always use it on HGTV on all those shows that are budget-friendly. It all seemed so perfect until we realized that 4 foot by 8 foot sheets of MDF were too big to fit in our SUV. Hmmm... another delimma, so off we went to start shopping in discount furniture stores.
After an intense day of shopping for furniture that would work (at this point in my life I had never heard of Craigslist), or that was not too expensive, I was a bit discouraged as I sat down in the last furniture store to collect my thoughts. It hit me as I was looking at the too-expensive perfect piece of furniture: the hardware store had that "big saw" and they could cut it! Am I smart or what?? Don't answer that! So, off to home we went so I could figure how to have the hardware store cut the 6 pieces of MDF into 3 or 4 pieces per sheet that would fit in my car, while using as much as possible of each sheet. Don't ask me how I do this stuff it is just how my brain is wired!
So, off to hardware store we went again and this time with an Excel diagram of each sheet of MDF, showing how to cut each sheet. They were really happy seeing me coming, NOT! And after a long, long two weeks for my husband who agreed to help me, I had the workstation to match the rest of the furniture in the bedroom finally built. My husband will tell you that once I get an idea in my head there is no stopping me! I won't stop until it is done, working from morning to night for as long as it takes. He loves that quality about me, I am sure! LOL
That is how my obsession with my scrapbooking room began.
Subscribe to:
Posts (Atom)